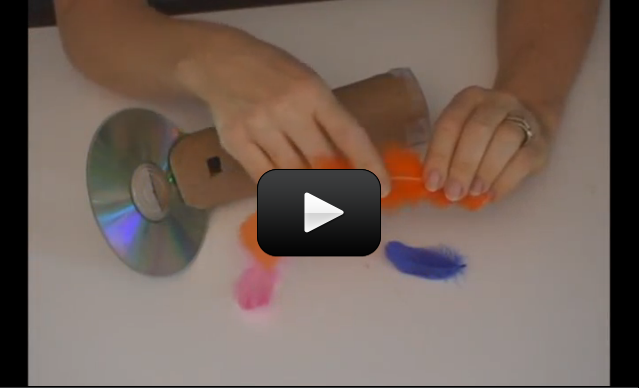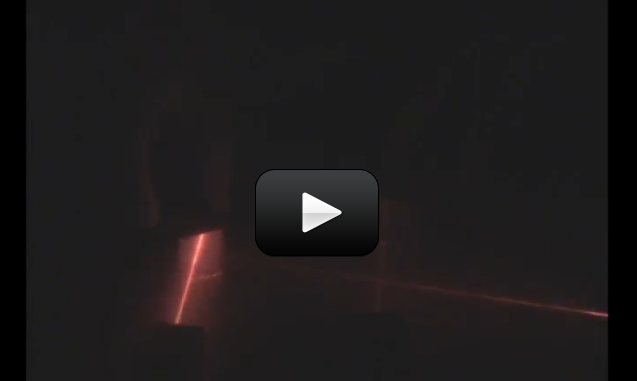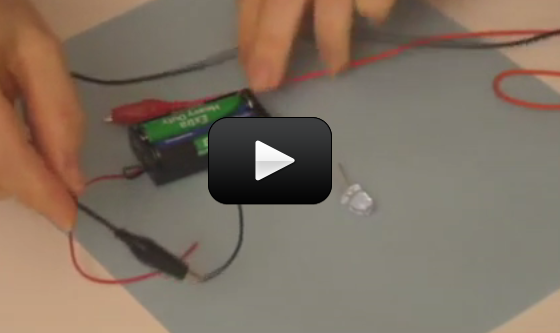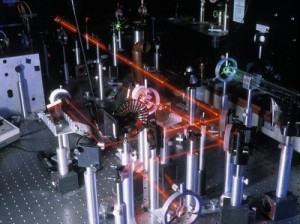
This super-cool project lets kids have the fun of playing tag in the dark on a warm summer evening, without the "gun" aspect traditionally found in laser tag. Kids not only get to enjoy the sport, but also have the pride that they build the tag system themselves - something you simply can't get from opening up a laser tag game box.
While real laser tag games actually never use lasers, but rather infrared beams, this laser tag uses real lasers, so you'll want to arm the kids with the "no-lasers-on-the-face" with a 10-minute time-out penalty to ensure everyone has a good time. You can alternatively use flashlights instead of lasers, which makes the game a lot easier to tag someone out.
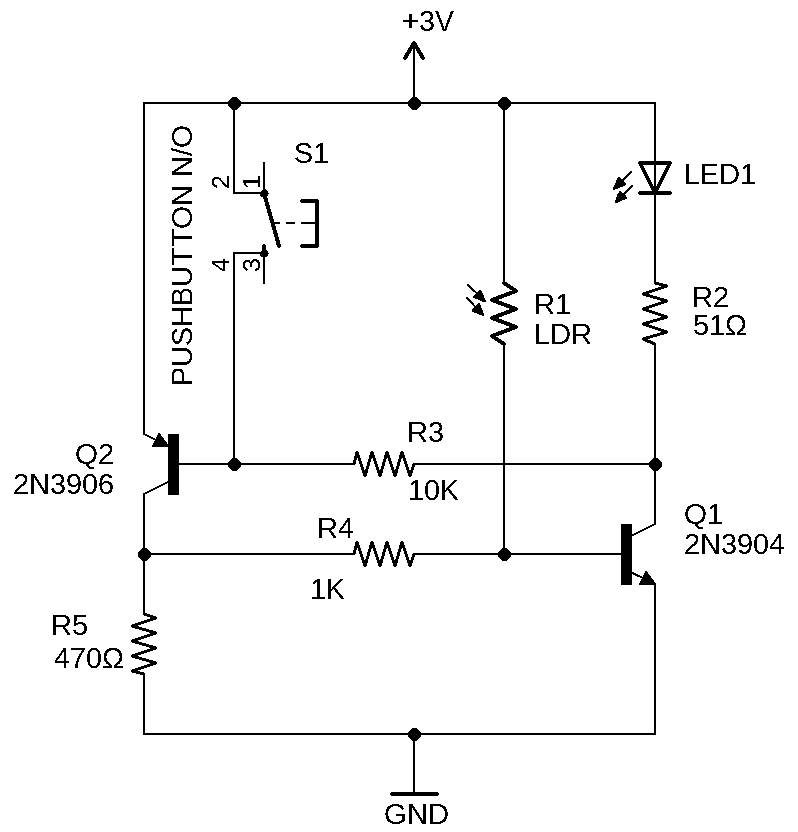
This game uses a simple two-transistor latching circuit design, so there's no programming or overly-complicated circuitry to worry about. If you've never built this kind of circuit before, it's a perfect first-step into the world of electronics.
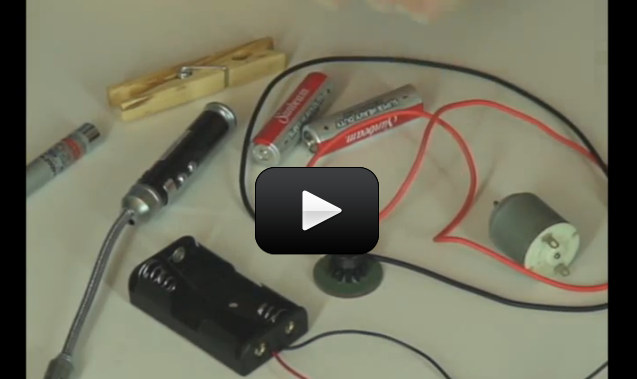
I've provided you with three videos below. This first video is an introduction to what we are going to make and how it works. Here's what you need:
NOTE: We updated this circuit in 2023 to reflect "best practices" when using transistors.
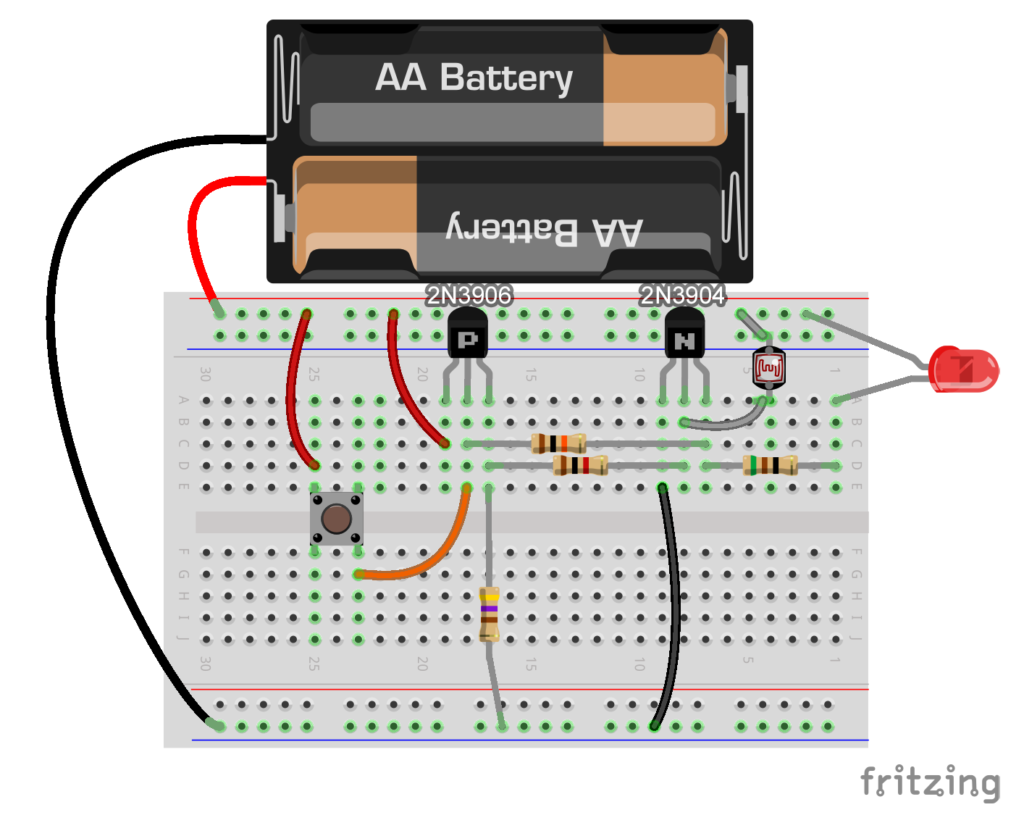
Be sure to build this project as shown in the schematic and breadboard diagrams, and not as shown in the video.
The material list below is based on the new design as shown in the schematic and breadboard diagrams on this page.
The videos show how to build the old circuit, but are still very useful.
Materials (the list below builds one complete set per kid):
- Two AA battery packs with batteries
- LED (any color)
- 51Ω resistor
- 10KΩ resistor
- 1KΩ resistor
- 470Ω resistor
- NPN transistor (2N3904 or 2N2222)
- PNP transistor (2N3906 or 2N4403)
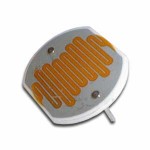
- CdS Cell
- Optional: N/O pushbutton switch
- Breadboard OR soldering equipment (including wire strippers, diagonal cutters, solder...)
- Flashlight or red (NOT green!!) laser
Flashlight Laser Tag Schematic:
Flashlight laser tag breadboard diagram:
Introduction to the Circuit
The next two videos below show you how to build the circuit, first on a breadboard, and then how to solder the circuit together, so you can opt to watch either one. If you have someone who's handy with tools and soldering irons, invite them to build this with you.
Building the Circuit on a Breadboard
Soldering the Circuit Together
You'll need one of these circuits for every player, although you can get by with one kid having a flashlight (this is the "it" person) and the other running around wearing the circuit trying not to get "tagged". You can mount these circuits inside a soap box or cardboard box with the sensor and light peeking out. Add a belt or wrist strap and you're ready for action!
This Unit is different. While normally, we stick to everyday items, this advanced unit on chemistry requires a full chemistry set. The good news is, you only have to buy one item, as it includes the glassware, safety gear, workbook, chemicals, and equipment. The downside? Don't eat any of these things, and store far out of reach from small kids and pets.
We’re going to be using real chemicals in this Unit, some of which are corrosive, hazardous, and most are toxic. This Unit is NOT for small children or households with loose pets (so stick the dog outside while you work). When your materials arrive, please keep ALL chemicals out of reach and sealed until you need them. We’ll show you how to safely store, mix, and clean up your chemicals.
Make sure you have goggles and gloves for all experiments, and protect your table (put it near a window for good ventilation) with a thick plastic tablecloth. You’ll be using real glassware for these experiments (included in the set) to do your experimenting.
Beginner Chemistry (Grades K-4)
For younger students, we do NOT recommend this unit. Instead, hop on over to a more appropriate Chemistry Level for your students here in Unit 3 and Unit 8.
Intermediate Chemistry (Grades 5-12)
There are now TWO Versions of each of the kits. Please make sure you select the correct version in order to make sure the videos in the curriculum line up with the experiments in your box.
(You can no longer purchase the original C3000. This kit was discontinued in 2018. Some families still have the original C3000, so we are keeping up the old videos in case they are needed.)
For Grades 5 - 8th: Thames & Kosmos C1000 v2.0
For Grades 9-12th: Thames & Kosmos C3000 v2.0 PLUS the items on THIS LIST.
TIP: Don't buy both the C1000 & C3000. There is a lot of overlap (at least, at the beginning of the C3000) between the two. If you know your child is going to continue their studies in Chemistry, then just get the C3000 and start your chemistry studies there. The C1000 is more for students who only need a bit of chemistry, not an entire, rigorous year-long course.
One box of the C3000 can be used for 2-3 students before refilling. In most cases, you can purchase individual refills here.
This Unit is different. While normally, we try to stick to everyday items, this advanced electronics course requires ordering from an online electronics store.
We're going to need additional supplies to those used in Unit 10. Keep both sets of electricity materials together (both from this Unit 14 and the previous Unit 10) until you need them, as there are lots of small parts! These two sets are the ones your kids will be using until they hit college and beyond.
Note: All the parts for these projects are included in Science Mastery Diamond.
Shopping List for Unit 14: Electronics: Click here for Shopping List for Unit 14.
NOTE: Radio Shack part numbers have been replaced. Click here for full chart.
Beginner (Grades K-4)
For younger students, we do NOT recommend this unit. Instead, hop on over to a more appropriate Electricity course for your students here in Unit 10.
Lesson 1: Intermediate (Grades 5-8)
For Lesson 1, you’ll need the following parts that can be found by clicking the links next to each part below.
- Breadboard (2"x3", 400-hole)
- Digital Multimeter (same one from Units 10, 11, and 12)
- Hookup wire (AWG 22g, solid), 6 feet
- CdS Photocell
- 100-ohm resistor (1/4 W)
- 1K-ohm resistor (1/4 W)
- 4.7K-ohm resistor (1/4 W)
- 5.6K-ohm resistor (1/4 W)
- 10K-ohm resistor (1/4 W)
- 100K-ohm resistor (1/4 W)
- PN2222 or 2N3904 (NPN) transistor
- 2N4403 or 2N3906 (PNP) transistor
- 0.47 μf electrolytic capacitor (>10V)
- 10 μf electrolytic capacitor
- 0.01 μf capacitor (103)
- Bi-polar red/green LED with 2 leads
- 10 alligator clip wires
- Electric buzzer (3-6V)
- 8-ohm speaker
- AA battery case that holds 2 AA's
- 9V battery snap
- 9V battery (alkaline battery recommended)
- 2 AA's batteries (Cheap dollar-store brand recommended that say "Heavy Duty" - you want the cheapest ones they have. Do NOT use alkaline batteries: NO Duracell or Energizer!)
The "Electronics Fundamentals" kit from FutureVision Research contains all the electronic parts (and more) needed for Lesson 1. Click here to order from FutureVision Research.
There are TWO books recommended (not required) for this unit. Here they are:
- Getting Started in Electronicsby Forrest Mims III (optional)
- MAKE: Electronics by Charles Pratt (optional)
Lessons 2 is for advanced students, and advanced 5-8th graders:
For Lesson 2, you’ll need the kits listed below. Most projects take a few hours to complete. I recommend starting with the Police Siren first.
- Police Siren This is the first kit you'll build to practice your soldering. The layout is larger than the rest, so it's easier to build. Click here to order.
- Touch Door Alarm An annoying alarm sounds when a person touches the knob! Click here to order.
- Rolling Clock Build your own clock with date display. Be sure to pick up the wall transformer if you want your clock to plug into the wall and not just run on batteries. Click here to order.
- FM Transmitter Picks up sounds or voices in the room and transmits them to a nearby FM radio. This is the 'Bug' from our spy kit series. Click here to order.
- Tools: You'll need a soldering iron (with a stand and plenty of solder), wire strippers, needle-nose pliers, diagonal cutters, and helping hands to hold your board as you work.
For Lessons 3 & 4 is for advanced students and advanced 5-8th graders:
- Electronic Learning Lab by Radio Shack This is the best learning lab I’ve found – it comes with tons of experiments that cover both basic and digital electronics projects! It includes everything you need for all the projects in Lessons 3 and 4, and covers the fundamentals of computer technology.
If you find your students are thirsty for more reading content that is provided in the project kit, then these are my three favorites. These books are recommended (not required) for this unit at the 9-12 grade level. Here they are:
- Getting Started in Electronicsby Forrest Mims III (optional)
- MAKE: Electronics by Charles Pratt (optional)
- Practical Electronics for Inventors by Paul Scherz (optional)
This Unit builds on the projects from Unit 12: Alternative Energy. If you haven’t already built the Steam Boat, Solar Ovens, or Stirling Engine (this engine is just for advanced students), you’ll want to go back and do those projects first. The focus of this unit is on temperature, heat transfer, how to use these ideas to build super-cool inventions in thermodynamics.
How many of these items do you already have? We’ve tried to keep it simple for you by making the majority of the items things most people have within reach (both physically and budget-wise), and even have broken down the materials by experiment category so you can decide if those are ones you want to do.
Shopping List for Unit 13: Thermodynamics Click here for Shopping List for Unit 13.
NOTE: Radio Shack part numbers have been replaced. Click here for full chart.
Temperature Experiments
- 2 water or soda bottles
- food dye
- index card
- pot, stove
- pepper
- ice cubes
- black paper, white paper
- aluminum foil
- rubbing alcohol
- dime, penny, and/or nickel
- gum wrapper (must be metallic on one side)
- index card
- six 7-9” balloons
- cooking oil (about a cup of the cheap kind)
OPTIONAL:
- 1 quart whole milk (do not substitute, unless your child has a milk allergy, then use soy or almond milk)
- 1 pint heavy cream (do not substitute, unless your child has a milk allergy, then skip)
- 1 cup sugar (or other sweetener)
- 1 tsp vanilla (use non-alcohol kind)
- rock salt (use table salt if you can’t find it)
- lots of ice
- freezer-grade zipper-style bags (you’ll need quart and gallon sizes)
Heat & Thermodynamics Experiments
- clear plastic (needle-less) syringe, 5– 20mL
- can of soda (leave unopened)
- four votive candles or tealights
- large glass jar (like a clean empty pickle jar)
- matches with adult help
- aluminum pie plate or cookie sheet
- liquid crystal sheet
- silver highlighter marker or aluminum foil
- block of foam (any scrap piece will work)
- 1/4-1/8” diameter x 12” metal tube (copper)
- thermometer
- bathtub
- stopwatch, ruler, tape, scissors
- drinking bird
- black paint and silver (or white) paint
- mug of hot water
For aAdvanced sStudents:
- fresh peanuts
- test tubes and test tube clamp
- large paper clips
In this case, the readily-available air is shoved downward by the pressure inside of balloon. This air flows down through the nozzle and out the bottom, under the CD, lifting it slightly as it goes and creating a thin layer for the CD to float on.
Although this particular hovercraft only has a 'hovering' option, I'm sure you can quickly figure out how to add a 'thruster' to make it zoom down the table! (Hint - you will need to add a second balloon!)
Here's what you need:
Please login or register to read the rest of this content.
This Unit is a bit different from the rest. While we usually try to keep the materials simple for you, some of these materials are not your everyday items. The projects in this unit are more intensive and expensive - you'll want to pick which ones you want to do before buying the materials.
We've broken the materials down in this list by project, so you'll find overlap between the different projects. Most projects take a bit of time to do - they're not like the quick 5-minute activities you have seen so far.
How the shopping list works: The first lesson are simpler and less expensive projects. The second lesson includes mid-priced projects for more K-8th students, and higher-end items (like the fuel cell and BEAM robots) which are appropriate for upper grades (5th-12th). We’ll be re-using items from Units 10 and 11 here, like motors, lights, battery packs, wires, and electrical components. If you already have these parts, simply scratch them off this list.
Shopping List for Unit 12: Alternative Energy Click here for Shopping List for Unit 12.
NOTE: Radio Shack part numbers have been replaced. Click here for full chart.
Lesson 1 Experiments:
- Bags (zipper-close and plastic)
- balloon
- batteries, AA-size
- bottle, plastic two-liter
- bowl, plastic
- clay, modeling
- corn syrup
- measuring cups and spoons
- cups (paper, plastic, and Styrofoam)
- earphone or headset
- Epsom salt
- Small electric fan
- Flowerpot with saucer (unglazed ceramic)
- Aluminum foil
- funnel
- grass clippings, freshly cut
- hole punch
- ice chest or cooler or freezer
- glass jars or water glass
- lamp with incandescent bulb
- Lysol spray
- magnifying lens
- match or lighter
- mitt, insulated
- newspaper
- oven
- black paint with paintbrush or black spray paint
- paper clips
- white copy paper
- peanut (shelled)
- penny
- aluminum pie pan
- pinwheel
- plate
- pliers
- shoebox
- silicon solar cell
- sink
- aluminum
- soft drink can
- spoons
- straw
- string
- tape
- tea bags
- thermometer
- tomato juice
- watch or clock
- water
- wires with alligator clips
Lesson 2 Experiments:
Solar Battery
- ½ sq. foot of copper flashing sheet (check the scrap bin at a hardware store)
- Alligator clip leads
- Multimeter
- Electric stove (not gas)
- Large plastic 2L soda bottle
- ¼ cup salt
- Sandpaper & sheet metal shears
Solar Oven
- Two large sheets of poster board (black is best)
- Aluminum foil
- Plastic wrap
- Black construction paper
- Cardboard box
- Pizza box (clean!)
- Tape & scissors
- Reusable plastic baggies
- Cookie dough (your favorite)
Marshmallow Roaster
- 7x10” page magnifier (Fresnel lens)
- Cardboard box, about a 10” cube
- Aluminum foil
- Hot glue, razor, scissors, tape
- Wooden skewers (BBQ-style)
- Chocolate, marshmallows, & graham crackers
BristleBot
- Old toothbrush
- Tiny vibrator motor (you can also rip one out of an old cell phone) or use a disk motor
- Small watch battery
Solar Vehicles
- Multimeter
- Solar Motor
- Solar Cell
- Foam block (about 6” long)
- 2 straws (optional)
- 2 wooden skewers (optional)
- 4 milk jug lids or film can tops
Wind Turbine
- A digital Multimeter
- Alligator clip leads
- 1.5-3V DC Motor
- 9-18VDC Motor
- Bi-polar LED
- Foam block (about 6” long)
- Propeller from an old toy or cheap fan
Fruit Batteries
- Apple, lemon, grapefruit, lime, potato, or other fruit/vegetable
- A digital Multimeter
- Alligator clip leads
- Zinc plate or galvanized nail
- Copper plate (1/2” x 2”) or shiny copper penny (you can scrub a tarnished penny with ketchup to shine it up)
Steamboats
- Copper tubing (1/8”-1/4” dia x 12” long)
- Votive candle
- Foam block
- Scissors or razor (with adult help)
- Bathtub
For Advanced Students
Stirling Engine
- three soft drink aluminum cans (Pepsi work best because of their unique rim shape)
- old inner tube from a bicycle
- super glue and instant-dry accelerator
- electrical wire (3-conductor solid 14g copper wire)
- water bottle cap
- 7-9" latex balloon
- fishing line (we used 15 lb. test, but any strength will work fine)
- 3 old CDs
- Penny
- Nylon bushing
- Votive candle and lighter
- Wooden base and wood screws (optional)
- Tools: tin snips or stainless steel scissors, pliers, can opener, hammer, drill and 1/16” bit, wire cutters, razor, push pin, electrical tape, permanent marker, swiss army knife
Crystal Radio
- Toilet paper tube
- Magnet wire
- Germanium diode: 1N34A
- 4.7k-ohm resistor
- Alligator clip test leads
- 100’ stranded insulated wire (for the antenna)
- Scrap of cardboard
- Brass fasteners (3-4)
- Telephone handset or get a crystal earphone
Fuel Cells
Fuel Cell Car Kit (Item# KT-FUELCCK from www.hometrainingtools.com). This kit is a bit expensive, but if you want to build a car that runs entirely from sunlight and water, this is the one you want to get. The company that makes this particular model also sells the conversion kits for (real!) cars. Great starter kit for kids interested in fuel cell technology - after kids get the hang of how it works, they can up the power and perhaps use it on a go-cart?
Beam Robots
- Tiny eccentric vibrating motor (or Solorbotics, or you can also rip one out of an old cell phone)
- Vibrating disk motor from Solarbotics (you can also rip one out of an old cell phone) or get one from Jameco
- Two 2.2k-Ohm resistors (or Solarbotics)
- Six 4700 μf electrolytic capacitors (or Solarbotics)
- Two PNP 3906 transistors (or Solarbotics (get a few extras, as these are the first things to burn out
- Twp NPN 3904 transistors (or Solarbotics) and get a few extras, as these are the first things to burn out)
- Two voltage triggers from Solarbotics (get the MCP112-315)
- Two 37x33mm solar cells from Solarbotics (we won't be using the circuit on the back - just the solar cell)
- Paper clips (a few of each: small and large)
- Hot glue gun, soldering iron with solder, electrical tape
- Pliers, wire cutters, diagonal cutters (if you have them)
Optional Beam Robots: After you've built the BEAM robots above, you can move onto more advanced designs. Here are the parts you'll need for them:
Let’s see how much you’ve picked up with these experiments and the reading – answer as best as you can. (No peeking at the answers until you’re done!) Just relax and see what jumps to mind when you read the question. You can also print these out and jot down your answers in your science notebook.
Click here for a printer-friendly version of the Unit 9: Light & Lasers Exercises.
Please login or register to read the rest of this content.
Let’s see how you did! If you didn’t get a few of these, don’t let it stress you out – it just means you need to play with more experiments in this area. We’re all works in progress, and we have our entire lifetime to puzzle together the mysteries of the universe!
Here’s printer-friendly versions of the exercises and answers for you to print out: Simply click here for printable questions and answers.
1. Light can change speed The word “LASER” stands for Light Amplification by Stimulated Emission of Radiation.
2. Light from a regular incandescent light bulb covers the entire spectrum as well as scatters all over the room. A laser beam is monochromatic – the light that shoots out is usually one wavelength and color, and is in a narrow beam.
3. Glass (like a window pane) and clear plastic (like a water bottle).
4. Take it in a steamy room, like just after a hot shower. Or aim it through a glass of water that has a drop of milk in it.
5. The laser beam hits a spinning mirror that’s off-center. The more angled the mirror mount, the larger the image that the laser traces out. Which is why this is a perfect project for kids – the sloppier they build it, the better the laser light show.
6. High-power CO2 lasers have an intense amount of heat that melts through metal. These aren’t the lasers we’re going to be working with! The lasers at the grocery store are Class I lasers, which will harm your eye if you stare into it without blinking once for at least 15 minutes. These ‘keychain’ lasers are Class II & III, some of which can overpower your retina in less than a minute, and the damage is irreversible. When I work with kids in a live Laser Lab class, I have a zero-tolerance rule (which is explained beforehand): if misused, I just walk over, take the laser without a word, and keep it. Class proceeds as normal, and it’s up to the kid to figure out how to finish the project.
Polarization has to do with the direction of the light. Think of a white picket fence – the kind that has space between each board. The light can pass through the gaps int the fence but are blocked by the boards. That’s exactly what a polarizer does.
When you have two polarizers, you can rotate one of the ‘fences’ a quarter turn so that virtually no light can get through – only little bits here and there where the gaps line up. Most of the way is blocked, though, which is what happens when you rotate the two pairs of sunglasses. Your sunglasses are polarizing filters, meaning that they only let light of a certain direction in. The view through the sunglasses is a bit dimmer, as less photons reach your eyeball.
Polarizing sunglasses also reduce darken the sky, which gives you more contrast between light and dark, sharpening the images. Photographers use polarizing filters to cut out glaring reflections.
Materials:
- two pairs of polarized sunglasses
- tape (the 3/4″ glossy clear kind works best – watch second video below)
- window
When light rays strikes a surface, part of the beam passes through the surface and the rest reflects back, like a ball bouncing on the ground. Where it bounces depends on how you throw the ball.
Have you ever looked into a pool of clear, still water and seen your own face? The surface of the water acts like a mirror and you can see your reflection. (In fact, before mirrors were invented, this was the only way people had to look at themselves.) If you were swimming below the surface, you’d still see your own face – the mirror effect works both ways.
Have you ever broken a pencil by sticking it into a glass of water? The pencil isn’t really broken, but it sure looks like it! What’s going on?
Please login or register to read the rest of this content.
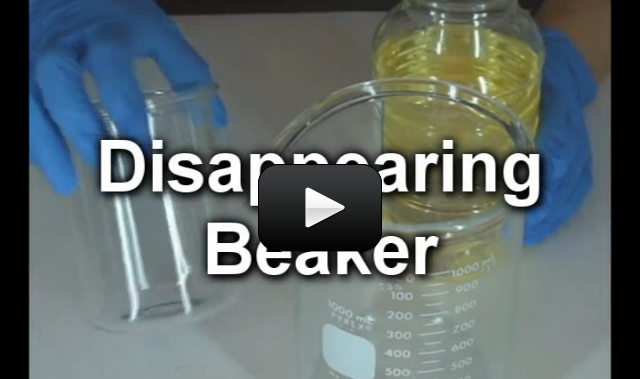
We’re going to bend light to make objects disappear. You’ll need two glass containers (one that fits inside the other), and the smaller one MUST be Pyrex. It’s okay if your Pyrex glass has markings on the side. Use cooking oil such as canola oil, olive oil, or others to see which makes yours truly disappear. You can also try mineral oil or Karo syrup, although these tend to be more sensitive to temperature and aren’t as evenly matched with the Pyrex as the first choices mentioned above.
Here’s what you need:
- two glass containers, one of which MUST be Pyrex glass
- vegetable oil (cheap canola brand is what we used in the video)
- sink
Published value for light speed is 299,792,458 m/s = 186,282 miles/second = 670,616,629 mph
Please login or register to read the rest of this content.
Hans Lippershey was the first to peek through his invention of the refractor telescope in 1608, followed closely by Galileo (although Galileo used his telescope for astronomy and Lippershey’s was used for military purposes). Their telescopes used both convex and concave lenses.
A few years later, Kepler swung into the field and added his own ideas: he used two convex lenses (just like the ones in a hand-held magnifier), and his design the one we still use today. We're going to make a simple microscope and telescope using two lenses, the same way Kepler did. Only our lenses today are much better quality than the ones he had back then!
You can tell a convex from a concave lens by running your fingers gently over the surface – do you feel a “bump” in the middle of your hand magnifying lens? You can also gently lay the edge of a business card (which is very straight and softer than a ruler) on the lens to see how it doesn't lay flat against the lens.
Your magnifier has a convex lens – meaning the glass (or plastic) is thicker in the center than around the edges. The image here shows how a convex lens can turn light to a new direction using refraction. You can read more about refraction here.
A microscope is very similar to the refractor telescope with one simple difference – where you place the focus point. Instead of bombarding you with words, let’s make a microscope right now so you can see for yourself how it all works together. Are you ready?
Spectrometers are used in chemistry and astronomy to measure light. In astronomy, we can find out about distant stars without ever traveling to them, because we can split the incoming light from the stars into their colors (or energies) and “read” what they are made up of (what gases they are burning) and thus determine their what they are made of. In this experiment, you’ll make a simple cardboard spectrometer that will be able to detect all kinds of interesting things!
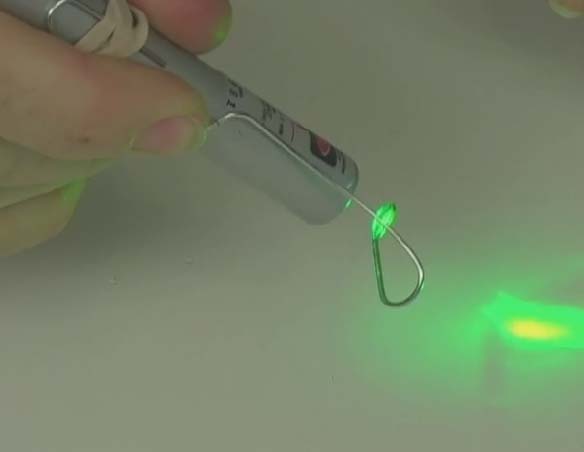
SPECIAL NOTE: This instrument is NOT for looking at the sun. Do NOT look directly at the sun. But you can point the tube at a sheet of paper that has the sun’s reflected light on it.
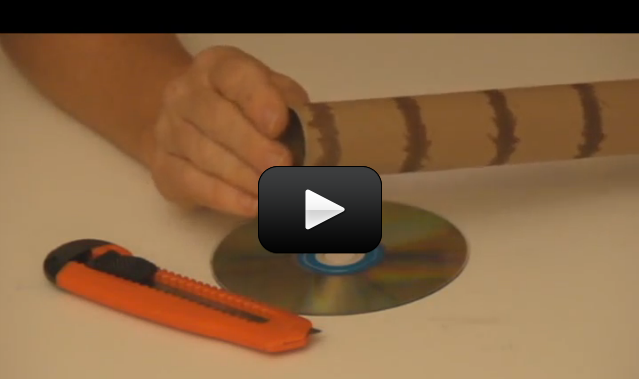
Usually you need a specialized piece of material called a diffraction grating to make this instrument work, but instead of buying a fancy one, why not use one from around your house? Diffraction gratings are found in insect (including butterfly) wings, bird feathers, and plant leaves. While I don’t recommend using living things for this experiment, I do suggest using an old CD.
CDs are like a mirror with circular tracks that are very close together. The light is spread into a spectrum when it hits the tracks, and each color bends a little more than the last. To see the rainbow spectrum, you’ve got to adjust the CD and the position of your eye so the angles line up correctly (actually, the angles are perpendicular).
You’re looking for a spectrum (the rainbow image at left) – this is what you’ll see right on the CD itself. Depending on what you look at (neon signs, chandeliers, incandescent bulbs, fluorescent bulbs, Christmas lights…), you’ll see different colors of the rainbow. For more about how diffraction gratings work, click here.
Materials:
- old CD
- razor
- index card
- cardboard tube
This is the simplest form of camera – no film, no batteries, and no moving parts that can break. The biggest problem with this camera is that the inlet hole is so tiny that it lets in such a small amount of light and makes a faint image. If you make the hole larger, you get a brighter image, but it’s much less focused. The more light rays coming through, the more they spread out the image out more and create a fuzzier picture. You’ll need to play with the size of the hole to get the best image.
While you can go crazy and take actual photos with this camera by sticking on a piece of undeveloped black and white film (use a moderately fast ASA rating), I recommend using tracing paper and a set of eyeballs to view your images. Here’s what you need to do:
Materials:
- box
- tracing paper
- razor or scissors
- tape
- tack
Here’s a trick question – can you make the color “yellow” with only red, green, and blue as your color palette? If you’re a scientist, it’s not a problem. But if you’re an artist, you’re in trouble already.
The key is that we would be mixing light, not paint. Mixing the three primary colors of light gives white light. If you took three light bulbs (red, green, and blue) and shined them on the ceiling, you’d see white. And if you could magically un-mix the white colors, you’d get the rainbow (which is exactly what prisms do.)
If you’re thinking yellow should be a primary color – it is a primary color, but only in the artist’s world. Yellow paint is a primary color for painters, but yellow light is actually made from red and green light. (Easy way to remember this: think of Christmas colors – red and green merge to make the yellow star on top of the tree.)
As a painter, you know that when you mix three cups of red, green, and blue paint, you get a muddy brown. But as a scientist, when you mix together three cups of cold light, you get white. If you pass a beam white light through a glass filled with water that’s been dyed red, you’ve now got red light coming out the other side. The glass of red water is your filter. But what happens when you try to mix the different colors together?
The cold light is giving off its own light through a chemical reaction called chemiluminescence, whereas the cups of paint are only reflecting nearby light. It’s like the difference between the sun (which gives off its own light) and the moon (which you see only when sunlight bounces off it to your eyeballs). You can read more about light in our Unit 9: Lesson 1 section.
Here’s what you need:
Please login or register to read the rest of this content.
When you warm up leftovers, have you ever wondered why the microwave heats the food and not the plate? (Well, some plates, anyway.) It has to do with the way microwave ovens work.
Microwave ovens use dielectric heating (or high frequency heating) to heat your food. Basically, the microwave oven shoots light beams that are tuned to excite the water molecule. Foods that contain water will step up a notch in energy levels as heat. (The microwave radiation can also excite other polarized molecules in addition to the water molecule, which is why some plates also get hot.)
One of the biggest challenges with measuring the speed of light is that the photons move fast… too fast to watch with our eyeballs. So instead, we’re going to watch the effects of microwave light and base our measurements on the effects the light has on different kinds of food. Microwaves use light with a wavelength of 0.01 to 10 cm (that’s ‘microwave’ part of the electromagnetic spectrum). When designing your experiment, you’ll need to pay close attention to the finer details such as the frequency of your microwave oven (found inside the door), where you place your food inside the oven, and how long you leave it in for.
Materials:
- chocolate bar (extra-large bars work best)
- microwave
- plate
- ruler
- calculator
- pencil and paper
Imagine you’re a painter. What three colors do you need to make up any color in the universe? (You should be thinking: red, yellow, and blue… and yes, you are right if you’re thinking that the real primary colors are cyan, magenta, and yellow, but some folks still prefer to think of the primary colors as red-yellow-blue… either way, it’s really not important to this experiment which primary set you choose.)
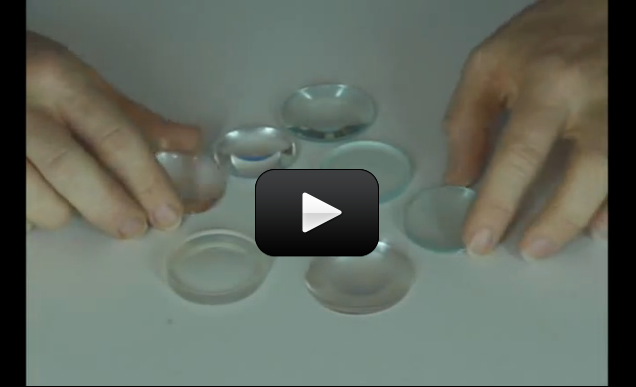
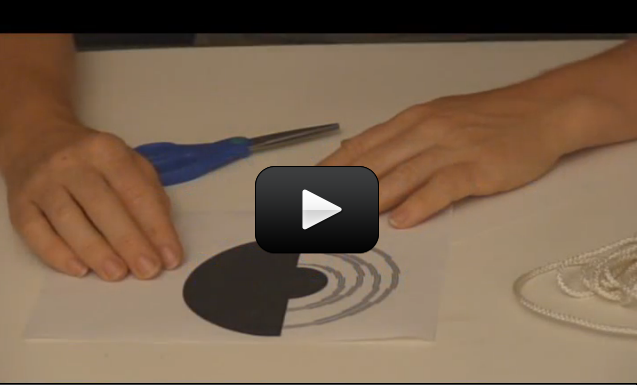
Here’s a trick question – can you make the color “yellow” with only red, green, and blue as your color palette? If you’re a scientist, it’s not a problem. But if you’re an artist, you’re in trouble already.
The key is that we would be mixing light, not paint. Mixing the three primary colors of light gives white light. If you took three light bulbs (red, green, and blue) and shined them on the ceiling, you’d see white. And if you could magically un-mix the white colors, you’d get the rainbow (which is exactly what prisms do.)
If you’re thinking yellow should be a primary color – it is a primary color, but only in the artist’s world. Yellow paint is a primary color for painters, but yellow light is actually made from red and green light. (Easy way to remember this: think of Christmas colors – red and green merge to make the yellow star on top of the tree.) It’s because you are using projection of light, not the subtrative combination of colors to get this result.
Here’s a nifty experiment that will really bring these ideas to life (and light!):
Materials:
- flashlight (three is best, but you can get by with two)
- fingernail polish (red, green, and blue)
- clear tape or cellophane (saran wrap works too)
- white wall space
When I was in grad school, I needed to use an optical bench to see invisible things. I was trying to ‘see’ the exhaust from a new kind of F15 engine, because the aircraft acting the way it shouldn’t – when the pilot turned the controls 20o left, the plane only went 10o. My team had traced the problem to an issue with the shock waves, and it was my job to figure out what the trouble was. (Anytime shock waves appear, there’s an energy loss.)
Since shock waves are invisible to the human eye, I had to find a way to make them visible so we could get a better look at what was going on. It was like trying to see the smoke generated by a candle – you know it’s there, but you just can’t see it. I wound up using a special type of photography called Schlieren.
An optical table gives you a solid surface to work on and nails down your parts so they don’t move. This is an image taken with Schlieren photography. This technique picks up the changes in air density (which is a measure of pressure and volume).
The air above a candle heats up and expands (increases volume), floating upwards as you see here. The Schlieren technique shines a super-bright xenon arc lamp beam of light through the candle area, bounces it off two parabolic mirrors and passes it through a razor-edge slit and a neutral density filter before reaching the camera lens. With so many parts, I needed space to bolt things down EXACTLY where I wanted them. The razor slit, for example, just couldn’t be anywhere along the beam – it had to be right at the exact point where the beam was focused down to a point.
I’m going to show you how to make a quick and easy optical lab bench to work with your lenses. Scientists use optical benches when they design microscopes, telescopes, and other optical equipment. You’ll need a bright light source like a flashlight or a sunny window, although this bench is so light and portable that you can move it to garage and use a car headlight if you really want to get creative. Once your bench is set up, you can easily switch out filters, lenses, and slits to find the best combination for your optical designs. Technically, our setup is called an optical rail, and the neat thing about it is that it comes with a handy measuring device so you can see where the focal points are for your lenses. Let’s get started:
Please login or register to read the rest of this content.
Charles Benhamho (1895) created a toy top painted with the pattern (images on next page). When you spin the disk, arcs of color (called “pattern induced flicker colors”) show up around the disk. And different people see different colors!
We can’t really say why this happens, but there are a few interesting theories. Your eyeball has two different ways of seeing light: cones and rods. Cones are used for color vision and for seeing bright light, and there are three types of cones (red, green, and blue). Rods are important for seeing in low light.
One possibility is… Please login or register to read the rest of this content.
In this experiment, water is our prism. A prism un-mixes light back into its original colors of red, green, and blue. You can make prisms out of glass, plastic, water, oil, or anything else you can think of that allows light to zip through.
What’s a prism? Think of a beam of light. It zooms fast on a straight path, until it hits something (like a water drop). As the light goes through the water drop, it changes speed (refraction). The speed change depends on the angle that the light hits the water, and what the drop is made of. (If it was a drop of mineral oil, the light would slow down a bit more.) Okay, so when white light passes through a prism (or water drop), changes speed, and turns colors. So why do we see a rainbow, not just one color coming out the other side?
Please login or register to read the rest of this content.
In a simplest sense, a kaleidoscope is a tube lined with mirrors. Whether you leave the end opened or tape on a bag of beads is up to you, but the main idea is to provide enough of an optical illusion to wow your friends. Did you know that by changing the shape and size of the mirrors, you can make the illusion 3D?
If you use only two mirrors, you’ll get a solid background, but add a third mirror and tilt together into a triangle (as shown in the video) and you’ll get the entire field filled with the pattern. You can place transparent objects at the end (like marbles floating in water or mineral oil) or just leave it open and point at the night stars.
The first kaleidoscopes were constructed in 1816 by a scientist while studying polarization. They were quickly picked up as an amusement gadget by the public and have stayed with us ever since.
Materials:
- three mirrors the same size
- tape and scissors
There are three primary colors of light are red, green, and blue. The three primary colors of paint are red, yellow, and blue (I know it’s actually cyan, yellow, and magenta, which we’ll get to in more detail later, but for now just stick with me and think of the primary colors of paint as red-yellow-blue and I promise it will all make sense in the end).
Most kids understand how yellow paint and blue paint make green paint, but are totally stumped when red light and green light mix to make yellow light. The difference is that we’re mixing light, not paint.
Lots of science textbooks still have this experiment listed under how to mix light: “Stir together one of red water and one glass of green water (dyed with food coloring) to get a glass of yellow water.” Hmmm… the result I get is a yucky greenish-brown color. What happened?
The reason you can’t mix green and red water to get yellow is that you’re essentially still mixing paint, not light. But don’t take our word for it – test it out for yourself with this super-fast light experiment on mixing colors.
Materials:
- pair of scissors
- crayons
- sharp wood pencil or wood skewer
- index cards
- drill (optional)
Ever play with a prism? When sunlight strikes the prism, it gets split into a rainbow of colors. Prisms un-mix the light into its different wavelengths (which you see as different colors). Diffraction gratings are tiny prisms stacked together.
When light passes through a diffraction grating, it splits (diffracts) the light into several beams traveling at different directions. If you’ve ever seen the ‘iridescence’ of a soap bubble, an insect shell, or on a pearl, you’ve seen nature’s diffraction gratings.
Scientist use these things to split incoming light so they can figure out what fuels a distant star is burning. When hydrogen burns, it gives off light, but not in all the colors of the rainbow, only very specific colors in red and blue. It’s like hydrogen’s own personal fingerprint, or light signature.
Astronomers can split incoming light from a star using a spectrometer (you can build your own here) to figure out what the star is burning by matching up the different light signatures.
Materials:
- feather
- old CD or DVD
Did you know that the word LASER stands for Light Amplification by Stimulated Emission of Radiation? And that a MASER is a laser beam with wavelengths in the microwave part of the spectrum? Most lasers fire a monochromatic (one color) narrow, focused beam of light, but more complex lasers emit a broad range of wavelengths at the same time.
In 1917, Einstein figured out the basic principles for the LASER and MASER by building on Max Planck’s work on light. It wasn’t until 1960, though when the first laser actually emitted light at Hughes Research Lab. Today, there are several different kinds of lasers, including gas lasers, chemical lasers, semiconductor lasers, and solid state lasers. One of the most powerful lasers ever conceived are gamma ray lasers (which can replace hundreds of lasers with only one) and the space-based x-ray lasers (which use the energy from a nuclear explosion) – neither of these have been built yet!
Please login or register to read the rest of this content.
By using lenses and mirrors, you can bounce, shift, reflect, shatter, and split a laser beam. Since the laser beam is so narrow and focused, you’ll be able to see several reflections before it fades away from scatter. Make sure you complete the Laser Basics experiment first before working with this experiment.
You’ll need to make your beam visible for this experiment to really work. There are several different ways you can do this:
Please login or register to read the rest of this content.
This is a super-cool and ultra-simple circuit experiment that shows you how a CdS (cadmium sulfide cell) works. A CdS cell is a special kind of resistor called a photoresistor, which is sensitive to light.
A resistor limits the amount of current (electricity) that flows through it, and since this one is light-sensitive, it will allow different amounts of current through depends on how much light it "sees".
Photoresistors are very inexpensive light detectors, and you'll find them in cameras, street lights, clock radios, robotics, and more. We're going to play with one and find out how to detect light using a simple series circuit.
Materials:
- AA battery case with batteries
- one CdS cell
- three alligator wires
- LED (any color and type)
Ever notice how BRIGHT your white t-shirt looks in direct sun? That’s because mom washed with fluorescent laundry soap (no kidding!). The soap manufacturers put in dyes that glow white under a UV light, which make your clothes appear whiter than they really are.
Since light is a form of energy, in order for things to glow in the dark, you have to add energy first. So where does the energy come from? There are are few different ways to do this:
Please login or register to read the rest of this content.
What happens when you shine a laser beam onto a spinning mirror? In the Laser Maze experiment, the mirrors stayed put. What happens if you took one of those mirrors and moved it really fast?
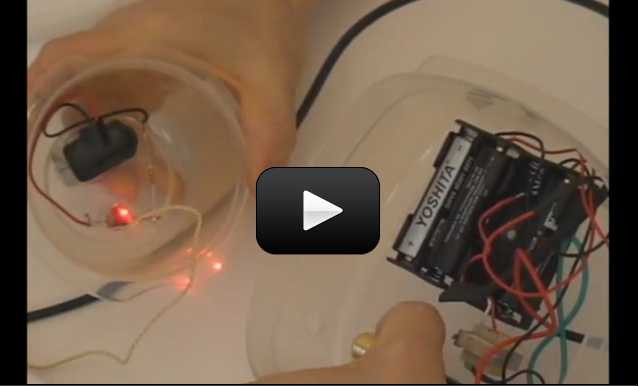
It turns out that a slightly off-set spinning mirror will make the laser dot on the wall spin in a circle. Or ellipse. Or oval. And the more mirrors you add, the more spiro-graph-looking your projected laser dot gets.
Why does it work? This experiment works because of imperfections: the mirrors are mounted off-center, the motors wobble, the shafts do not spin true, and a hundred other reasons why our mechanics and optics are not dead-on straight. And that’s exactly what we want – the wobbling mirrors and shaky motors make the pretty pictures on the wall! If everything were absolutely perfectly aligned, all you would see is a dot.
Here’s how to do this experiment:
Please login or register to read the rest of this content.
This experiment is for advanced students.Did you know that when you talk inside a house, the windows vibrate very slightly from your voice? If you stand outside the house and aim a laser beam at the window, you can pick up the vibrations in the window and actually hear the conversation inside the house.
Remember how windows split a laser beam in two from the Laser Basics experiment? That’s the basic idea behind it. First, I’ll show you how to build your own space-age laser communicator, then you can work on your spy device.
The first thing we’re going to do is take the music from your stereo or MP3 player and transmit it on a laser beam to a detector on the other side. The detector has an earphone attached, so someone else can listen to the music from your laser. Weird, huh?
Here’s how to build your own:
Please login or register to read the rest of this content.
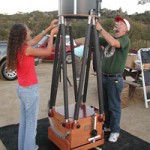
So you’ve played with lenses, mirrors, and built an optical bench. Want to make a real telescope? In this experiment, you’ll build a Newtonian and a refractor telescope using your optical bench.
Materials:
- optical bench
- index card or white wall
- two double-convex lenses
- concave mirror
- popsicle stick
- mirror
- paper clip
- flash light
- black garbage bag
- scissors or razor
- rubber band
- wax paper
- hot glue
Light can be either a wave or a particle, but not both at the same time. Which one it is will depend on what it’s doing. In this section, you’ll be able to figure out how intensity (how bright), frequency (wavelength), polarization (the direction of the electric field), and phase (time shift) all affect the kind of light you see and don’t see. Most light isn’t detectable by the human eye, which makes studying light more like investigating a crime scene. You’ll quickly be puzzling the pieces together to explain why pencils in a glass of water appear broken, why light beams can fry an egg, and how to build a telescope.
Please login or register to read the rest of this content.
The word “LASER” stands for Light Amplification by Stimulated Emission of Radiation. A laser is an optical light source that emits a concentrated beam of photons. Lasers are usually monochromatic – the light that shoots out is usually one wavelength and color, and is in a narrow beam. By contrast, light from a regular incandescent light bulb covers the entire spectrum as well as scatters all over the room. (Which is good, because could you light up a room with a narrow beam of light?).
Soon you’ll be building shattering light rays, firing music on a laser beam, and building your own laser light show from tupperware. Let’s get started by learning about lasers with this video:
Please login or register to read the rest of this content.
UV (ultra-violet) light is invisible, which means you need more than your naked eyeball to do experiments with it. Our sun gives off light in the UV. Too much exposure to the sun and you’ll get a sunburn from the UV rays.
There are many different experiments you can do with UV detecting materials, such as color-changing UV beads and UV nail polish.
Here are a few fun activities you can do with your UV detecting materials:
Please login or register to read the rest of this content.
An average can of soda at room temperature measures 55 psi before you ever crack it open. (In comparison, most car tires run on 35 psi, so that gives you an idea how much pressure there is inside the can!)
If you heat a can of soda, you’ll run the pressure over 80 psi before the can ruptures, soaking the interior of your house with its sugary contents. Still, you will have learned something worthwhile: adding energy (heat) to a system (can of soda) causes a pressure increase. It also causes a volume increase (kaboom!).
How about trying a safer variation of this experiment using water, an open can, and implosion instead of explosion?
Materials – An empty soda can, water, a pan, a bowl, tongs, and a grown-up assistant.
NOTE: If you can get a hold of one, use a beer can – they tend to work better for this experiment. But you can also do this with a regular old soda can. And no, I am not suggesting that kids should be drinking alcohol! Go ask a parent to find you one – and check the recycling bin.
Please login or register to read the rest of this content.
How many of these items do you already have? We've tried to keep it simple for you by making the majority of the items things most people have within reach (both physically and budget-wise), and even have broken down the materials by experiment category so you can decide if those are ones you want to do.
Don’t be afraid of this shopping list! The materials are broken down by availability and expense, and you can order online. The items in the first list are low-cost materials you already have or can easily add to your next grocery store list. The next lists include mid-priced equipment for more in-depth projects, and the last list of items is appropriate for upper grades.
We’ll be re-using these items for Units 12 and beyond (like motors, lights, battery packs, wires, and electrical components).
Shopping List for Unit 11: Magnetism: Click here for Shopping List for Unit 11.
NOTE: Radio Shack part numbers have been replaced. Click here for full chart.
Basic Magnetism
- Compass (at least one, but more is better)
- Needle or thin nail
- Cork or foam piece
- Cup (non-metal)
- Shallow baking dish (non-metal)
- Caps from water bottles or milk jugs
- 2 strong magnets (KJ Magnetics)
- Assortment of magnets, one larger than the rest
- Iron filings (you can take a metal file to a nail)
- Disposable plate
- Paper and pencil
- Magnet wire
- 8 donut-shaped magnets
- Packing peanuts (about 10)
- Film canisters (2)
- Long nails (2)
- Sand paper (small 2" x 2" piece, fine grit)
- D-cell battery
- Bare wire OR aluminum foil
- 2 large paper clips
- 1 rubber band
- String (3’)
- Tape, scissors
- Optional: Clay (small piece)
Ferrofluid
- Old laser printer cartridge (get these for free from a place that recycles them, like an office supply store)
- Oil – vegetable or baby oil (only a few teaspoons)
- Popsicle stick and disposable cup
Ultra-Cool Magnet Projects
In addition to the items from Basic Magnetism, you'll need these items from Unit 10: Electricity:
- 4 AA battery packs
- 8 AA batteries (preferably NOT alkaline but rather the cheap ‘heavy duty’ dollar-store type)
- LEDs (Bipolar or Tristate)
- Buzzer
- 3VDC motor
- 10 alligator clip leads
AND you'll also need:
- Small paper clips
- Empty soup can or 2 large paper clips
- 6 large paper clips
- 4 brass fasteners
- 12VDC motor
- Wooden ruler with groove down the center
- 8 strong rubber bands
- 9 nickel-plated ball bearings (NSBA)
- Four ½” metal plated cubes (B888)
- Screw (at least 1½” long)
- 5 disc magnets (DC2)
- Aluminum sheet (like a cookie sheet)
- Reed switch
- Two large grapes
- Straw
- String (3’)
- Sticky tape (Scotch Magic tape works well)
For Advanced Students:
Buzzer:
Curie Engine:
- Two tiny bead magnets (R211 and/or R311)
- One ceramic magnet
- Thin wire (28-32g)
- Votive candle and lighter (keep out of reach)
Rail Accelerator:
- 9V battery clip & 9V battery
- Aluminum foil (3’ length)
- Posterboard
- 1 wire coat-hanger (not insulated)
- Two disc magnets (D21)
- Two metal-plated disc magnets (D41G)
- Vice grips or cutters (to cut a wire coat hanger)
Listening to Magnetism
- Bolt (2 ½” long and ¼” diameter) and 2 washers and a nut that fits the bolt
- Amplified Speaker (iPod Speaker) from the Laser Communicator in Unit 9.
- Audio plug
- Wire
- Strong magnet (borrow one of the ½” metal plated cubes from above list)
- Cookie sheet (made from steel, not aluminum)
Speakers
You’ll be making three different kinds of speakers here. If you haven't made these yet from Unit 6, NOW is the time to make them. Here's what you need:
- Foam plate (paper and plastic don’t work as well)
- Sheet of copy paper
- 3 business cards
- Magnet wire
- 2 neodymium magnets (DA4)
- 1” donut magnet
- Index cards or stiff paper
- Plastic disposable cup (not paper)
- Tape
- Hot glue gun
- Scissors
- 1 audio plug or other cable that fits into your boombox (iPODs and expensive stereos are not recommended for this project, as they will be damaged by the low resistance of the speakers)
How many of these items do you already have? We've tried to keep it simple for you by making the majority of the items things most people have within reach (both physically and budget-wise), and even have broken down the materials by experiment category so you can decide if those are ones you want to do.
Don’t be afraid of this shopping list! The materials are broken down by availability and expense, and you can order online. The items in the first list are low-cost materials you already have or can easily add to your next grocery store list. The next lists include mid-priced equipment for more in-depth projects, and the last list of items is appropriate for upper grades.
We’ll be re-using these items for Units 11 and 12 (like motors, lights, battery packs, wires, and electrical components). The materials listed here are for building five different robots (with remote control), six burglar alarms, and a handful of sensor circuits.
Shopping List for Unit 10: Electricity Click here for Shopping List for Unit 10.
NOTE: Radio Shack part numbers have been replaced. Click here for full chart.
Basic Electricity
- Regular sized latex balloon
- 1 sheet of tissue paper
- Fluorescent bulb (borrow the long ‘tube’ kind from your house, or get a burnt out one from the recycling)
- Plastic grocery bag
- Wool sweater, socks, or mittens to wear
- Wire coat-hanger (not insulated)
- Packing peanuts (about 20)
- Yard stick (AKA meter stick)
- Soup spoon (bigger is better)
- 2 tablespoons dill
- Vegetable oil (or mineral oil)
- Lid from a jar (jam, pickle, mayo…)
- Bubble solution (store-bought, or use our recipe:
(12 c cold water + 1 c clear Ivory dish soap)
Electric Circuits & Burglar Alarms
- 2 wire coat-hangers (not insulated)
- 1 sheet of tissue paper
- 3 shiny copper pennies
- 25 large popsicle sticks (tongue depressor size)
- Brass (use brass fasteners, wood screws or keys)
- Iron (find two uncoated nails if you can)
- Silver (‘real’ silverware)
- Zinc (find two galvanized nails)
- Graphite (from a mechanical pencil)
- Baking soda (2 tablespoons)
- Film canister (or other small container with lid)
- 2 pcs cardboard (or 6”x 4”x 2” wood scrap)
- 4’ length aluminum foil (used for several experiments)
- 1” square sponge square of squishy foam (or thin sponge) that reforms into shape when released
- 10 small paper clips
- 12 large paper clips
- 12 brass fasteners
- 2 wooden spring-type clothespins
- 5 unpainted steel thumbtacks
- Thin bare wire (28g) or rip open an alligator clip
- 2 index cards
- Salt (about 8 tablespoons)
- Skillet and stove
- 2 clean glass jars (pickle, jam, mayo…)
- 8 AA battery packs
- LEDs (Bipolar or Tristate)
- Neon Lamp
- Buzzer
- 3VDC motor
- 10-20 alligator clip leads
- SPST push-button switch
- 1K-ohm potentiometer
- CdS cell
- Red laser pointer (from Unit 9) or flashlight
- AA batteries for your battery case (Cheap dollar-store “heavy duty” type are perfect. Alkaline batteries are NOT recommended.)
Robotics & Remote Controls
You'll need the parts from 'Electric Circuits' and these items:
- 6 3VDC motors
- 7 wheels (tops from film canisters, small yogurt containers, milk jugs, orange juice, etc.)
- 4 straws
- 1 long bolt (2" or longer) with nut
- 2 toothbrushes or plastic spoons
- 2 blocks of foam (2” x 4” x 6” or larger)
- 1 wooden spring-type clothespin
- 20 wooden skewers (for 3 different robots)
- 1 propeller that fits onto the motor shaft (read over comments below before purchasing!)
- 2 gears** or cork
- Plastic soap container (optional)
- Basic tools (scissors, tape, hot glue gun, and drill with bit the size of the motor shaft)
**If you have trouble finding these parts (ones with ** next to them) just send us an email.
For Advanced Students:
You'll need the parts from the lists above and these items:
Digital Multimeter - You'll need one of these for the rest of your projects.
Air Battery
- Paper towel
- Activated charcoal (from a fish store)
- Aluminum foil
Alien Detector
- LED (any regular LED works fine)
- MPF 102 – buy 2, because these are the first things to burn out in your circuit
- 9V battery clip and a 9V battery – you should have a spare from the Laser Communicator project in Unit 9 you can use
Tools: Wire strippers, pliers, scissors, soldering iron, solder, stand
Superfast Bug Bot
- 1 large paper clip
- 1 round bead that fits onto the large paperclip
- 2 small paperclips
- Soda can (empty and clean)
- AA battery holder with AA's
- 2 momentary switches
- 2 hobby motors
- 2 3/16" female quick disconnnect insulated connectors
- Heat shrink tubing
- Optional: slide switch
- Insulated wire (you can also use the wire from your battery holder, as you'll snip most of it off anyway)
Tools:
- Wire strippers
- Pliers, scissors
- Soldering iron, solder, stand
Underwater Remotely Operated Vehicle
The underwater robot (R.O.V.) is a much larger-scale project than usual. Expect to spend at least 14 hours on building this ultra-cool remotely operated underwater vehicle that swims in lakes and pools.
- ½” PVC pipe (6 pieces: 1.5” long, 4 pieces 2.5” long, 4 pieces 3” long, 2 pieces 4” long, 2 pieces 4.5” long, and 2 pieces 12” long… total length is roughly 6 feet of pipe.)
- 2” diameter (two pieces 6” long each)
- Four 2” PVC end caps
- Four ½” PVC tees (slip-slip-slip)
- Ten 90 deg. Elbow (slip-slip)
- Coarse sand paper
- Three 1” pipe clamps (U-shape with 2 mounting holes)
- Three propellers that fit onto the motor shaft
- Three 12VDC motors
- Three film canisters (black Kodak canisters work great if you can still find them)
- Three DPDT switches with a center OFF
- 30 ft. of “CAT-3” (or “CAT-5”) telephone/network cable (8-conductor or 4-pair, AWG 24)
- Project box (you’ll need a plastic box: tupperware, soap dishes, or plastic project box)
- 6-10 zip ties
- Wire (or plastic) mesh screen, 12” x 8” piece
Tools:
- Soldering iron with solder
- Pliers, screwdriver
- Drill with drill bits
- Silicone or toilet seal wax (and old mug to liquefy it in)
- Vaseline
- Power supply (12VDC car battery or car charger)
Most resources that public school advisers suggest for gifted or bright kids are a ‘mile wide and an inch deep’ – they don’t really go into depth on any one area. After traveling to dozens of home school conventions for several years across the country and seeing what math options are out there, I searched for more options than what’s traditionally on the exhibit floor.
After talking with math professors from Harvey Mudd, Stanford, Princeton, UCLA, and others, I thought you might like to know about their recommendations for resources that might be useful to you on how to deliver math skills in a way that really lasts.
For kids just starting out with Math: Dr. Wright’s Kitchen Table Math
For kids not quite ready for Algebra: Singapore Math Series
For kids Algebra through Calculus: Art of Problem Solving
These two work well together, and lead right into each other. If you’re looking for a DVD series, then you’ll want to get Arthur Benjamin’s 24-lecture ‘Joy of Mathematics’ DVDs.
More Math Resources
These resources are for kids that are really into math and enjoy diving deep:
- Go Figure A totally cool book about numbers that my kids love to read in carpool.
- Why Pi? is the second book that builds more on the ideas from Go Figure
- Story of Math is a 2-volume DVD set you can find at your library that focuses on how and why math was developed and the current ideas about who discovered what and when.
- Fractals – Hunting the Hidden Dimension This is a Nova documentary you can find at the library which has enough plain-English for everyone. By the way, fractals are fragmented geometric shapes split into parts, each of which is approximately a reduced-size copy of the whole thing. Fractals are between dimension 2 and 3, depending on their depth.
- Games for Math – this book is a treasure-trove of math games you can make out of papers, scissors, and a little time. We’ve done a lot of these with our kids when they were in K-2nd grade. Find it at your library so you can browse through it yourself.
- Ten Marks A math curriculum that’s aligned with state standards.
Let’s see how much you’ve picked up with these experiments and the reading – answer as best as you can. (No peeking at the answers until you’re done!) Just relax and see what jumps to mind when you read the question. You can also print these out and jot down your answers in your science notebook.
Please login or register to read the rest of this content.
Let’s see how you did! If you didn’t get a few of these, don’t let it stress you out – it just means you need to play with more experiments in this area. We’re all works in progress, and we have our entire lifetime to puzzle together the mysteries of the universe!
Here’s printer-friendly versions of the exercises and answers for you to print out: Simply click here for printable questions and answers.
Answers:
Please login or register to read the rest of this content.
Chemical Data & Safe Handling Information Sheet
What do I really need to know first? First of all, the chemicals in this set should be stored out of reach of pets and children. Grab the chemicals right now and stuff them in a safe place where accidents can’t happen. Do this NOW! When you’re done storing your chemicals out of reach, come back and download this Chemical Safety Sheet AND watch this video.
Click here to Download the Chemical Safety Information!
[/am4show]
If you’ve ever burped, you know that it’s a lot easier to do after chugging an entire soda. Now why is that?
Soda is loaded with gas bubbles — carbon dioxide (CO2), to be specific. And at standard temperature (68oF) and pressure (14.7 psi), carbon dioxide is a gas. However, if you burped in Antarctica in the wintertime, it would begin to freeze as soon as it left your lips. The freezing temperature of CO2 is -109oF, and Antarctic winters can get down to -140oF. You’ve actually seen this before, as dry ice (frozen burps!).
Carbon dioxide has no liquid state at low pressures (75 psi or lower), so it goes directly from a block of dry ice to a smoky gas (called sublimation). It’s also acidic and will turn cabbage juice indicator from blue to pink. CO2 is colorless and odorless, just like water, but it can make your mouth taste sour and cause your nose to feel as if it’s swarming with wasps if you breathe in too much of it (though we won’t get anywhere near that concentration with our experiments).
The triple point of CO2 (the point at which CO2 would be a solid, a liquid, and a gas all at the same time) is around five times the pressure of the atmosphere (75 psi) and around -70oF. (What would happen if you burped then?)
What sound does a fresh bottle of soda make when you first crack it open? PSSST! What is that sound? It’s the CO2 (carbon dioxide) bubbles escaping. What is the gas you exhale with every breath? Carbon dioxide. Hmmm … it seems as if your soda is already pre-burped. Interesting.
We’ll actually be doing a few different experiments, but they all center around producing burps (carbon dioxide gas). The first experiment is more detective work in finding out where the CO2 is hiding. With the materials we’ve listed (chalk, tile, limestone, marble, washing soda, baking soda, vinegar, lemon juice, etc. …) and a muffin tin, you can mix these together and find the bubbles that form, which are CO2. (Not all will produce a reaction.) You can also try flour, baking powder, powdered sugar, and cornstarch in place of the baking soda. Try these substitutes for the vinegar: water, lemon juice, orange juice, and oil.
Materials:
- baking soda
- chalk
- distilled white vinegar
- washing soda
- disposable cups and popsicle sticks
This is one of those 'chemistry magic show' type of experiments to wow your friends and family. Here's the scoop: you take a cup of clear liquid, add it to another cup of clear liquid, stir for ten seconds, and you'll see a color change, a state change from liquid to solid, and you can pull a rubber-like bouncy ball right out of the cup.
When you think of slime, do you imagine slugs, snails, and puppy kisses? Or does the science fiction film The Blob come to mind? Any way you picture it, slime is definitely slippery, slithery, and just plain icky — and a perfect forum for learning real science.
But which ingredients work in making a truly slimy concoction, and why do they work? Let’s take a closer look…
Imagine a plate of spaghetti. The noodles slide around and don’t clump together, just like the long chains of molecules (called polymers) that make up slime. They slide around without getting tangled up. The pasta by itself (fresh from the boiling water) doesn’t hold together until you put the sauce on. Slime works the same way. Long, spaghetti-like chains of molecules don’t clump together until you add the sauce … until you add something to cross-link the molecule strands together.
The sodium-tetraborate-and-water mixture is the “spaghetti” (the long chain of molecules, also known as a polymer), and the “sauce” is the glue-water mixture (the cross-linking agent). You need both in order to create a slime worthy of Hollywood filmmakers.
Please login or register to read the rest of this content.
Phenolphthalein is a weak, colorless acid that changes color when it touches acidic (turns orange) or basic (turns pink/fuchsia) substances. People used to take it as a laxative (not recommended today, as ingesting high amounts may cause cancer). Use gloves when handling this chemical, as your skin can absorb it on contact. I’ll show you how:
Please login or register to read the rest of this content.
You can use this as real ink by using it BEFORE you combine them together like this: dip a toothpick into the first solution (sodium ferrocyanide solution) and with the tip write onto a sheet of paper.
While the writing is drying, dip a piece of paper towel int other solution (ferric ammonium sulfate solution) and gently blot along where you wrote on the paper… and the color appears as blue ink. You can make your secret message disappear by wiping a paper towel dipped in a sodium carbonate solution.
You can also grow purple, gold, and red crystals with these chemicals… we’ll show you how!
Materials:
- sodium ferrocyanide
- ferric ammonium sulfate
- 2 test tubes
- distilled water
- goggles and gloves
- water
Dissolving calcium chloride is highly exothermic, meaning that it gives off a lot of heat when mixed with water (the water can reach up to 140oF, so watch your hands!). The energy released comes from the bond energy of the calcium chloride atoms, and is actually electromagnetic energy.
When you combine the calcium chloride and sodium carbonate solutions, you form the new chemicals sodium chloride (table salt) and calcium carbonate. Both of these new chemicals are solids and “fall out” of the solution, or precipitate. If you find that there is still liquid in the final solution, you didn’t have quite a saturation solution of one (or both) initial solutions.
Please login or register to read the rest of this content.
I mixed up two different liquids (potassium iodide and a very strong solution of hydrogen peroxide) to get a foamy result at a live workshop I did recently. See what you think!
Note: because of the toxic nature of this experiment, it’s best to leave this one to the experts.
Nurses will put hydrogen peroxide on a cut to kill germs. It’s also used in rocket fuel as an oxidizer. The hydrogen peroxide in your grocery store is a weak 3% solution. The hydrogen peroxide used here is 10X stronger than the grocery store variety. The KI (potassium iodide) is the catalyst in the experiment which speeds up the decomposition of the hydrogen peroxide. This is an exothermic reaction (gives off heat).
What state of matter is fire? Is it a liquid? I get that question a LOT, so let me clarify. The ancient scientists (Greek, Chinese… you name it) thought fire was a fundamental element. Earth, Air Water, and Fire (sometimes Space was added, and the Chinese actually omitted Air and substituted Wood and Metal instead) were thought to be the basic building blocks of everything, and named it an element. And it’s not a bad start, especially if you don’t have a microscope or access to the internet.
Today’s definition of an element comes from peeking inside the nucleus of an atom and counting up the protons. In a flame, there are lots of different molecules from NO, NO2, NO3, CO, CO2, O2, C… to name a few. So fire can’t be an element, because it’s made up of other elements. So, what is it?
Please login or register to read the rest of this content.
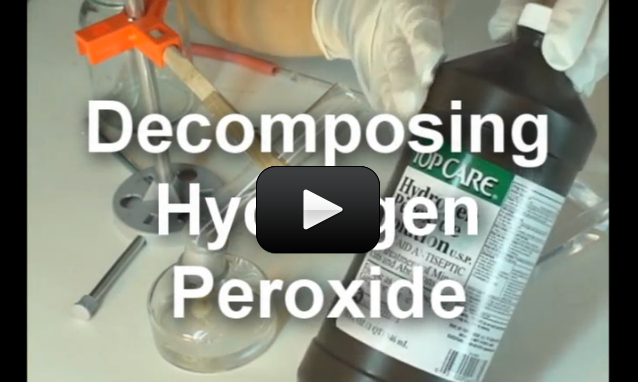
This experiment below is for advanced students. If you’ve ever wondered why hydrogen peroxide comes in dark bottles, it’s because the liquid reacts with sunlight to decompose from H2O2 (hydrogen peroxide) into H2O (water) and O2 (oxygen). If you uncap the bottle and wait long enough, you’ll eventually get a container of water (although this takes a LOOONG time to get all of the H2O2 transformed.)
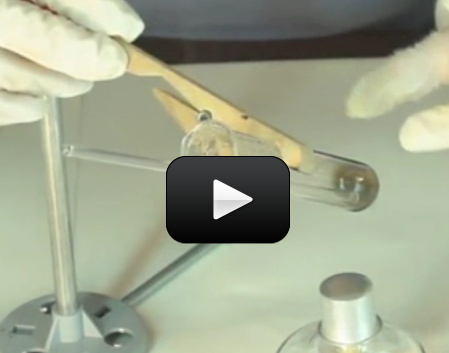
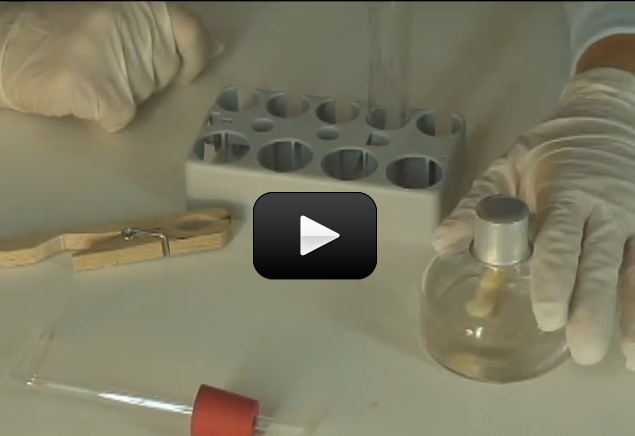
Here’s a way to speed up the process and decompose it right before your eyes. For younger kids, you can modify this advanced-level experiment so it doesn’t involve flames. Here’s what you do:
Please login or register to read the rest of this content.
This experiment is for advanced students.Have you ever taken a gulp of the ocean? Seawater can be extremely salty! There are large quantities of salt dissolved into the water as it rolled across the land and into the sea. Drinking ocean water will actually make you thirstier (think of eating a lot of pretzels). So what can you do if you’re deserted on an island with only your chemistry set?
Let me show you how to take the salt out of water with this easy setup.
Please login or register to read the rest of this content.
If you’ve ever owned a fish tank, you know that you need a filter with a pump. Other than cleaning out the fish poop, why else do you need a filter? (Hint: think about a glass of water next to your bed. Does it taste different the next day?)

There are tiny air bubbles trapped inside the water, and you can see this when you boil a pot of water on the stove. The experimental setup shown in the video illustrates how a completely sealed tube of water can be heated… and then bubbles come out one end BEFORE the water reaches a boiling point. The tiny bubbles smoosh together to form a larger bubble, showing you that air is dissolved in the water.
Materials:
- test tube clamp
- test tube
- lighter (with adult help)
- alcohol burner or votive candle
- right-angle glass tube inserted into a single-hole stopper
- regular tap water
If you had a choice between a glass of lemon juice or apple juice, most folks would pick the sweeter one – apple. Did you know that apples are loaded with malic acid, and are actually considered to be acidic? It’s just that there is so much more sugar in an apple than a lemon that your taste buds can be fooled. Here’s a scientific way (which is much more reliable) to tell how acidic something is.
Acids are sour tasting (like a lemon), bases are bitter (like unsweetened cocoa powder). Substances in the middle are more neutral, like water. Scientists use the pH (power of hydrogen, or potential hydrogen) scale to measure how acidic or basic something is. Hydrochloric acid registers at a 1, sodium hydroxide (drain cleaner) is a 14. Water is about a 7. pH levels tell you how acidic or alkaline (basic) something is, like dirt. If your soil is too acidic, your plants won’t attract enough hydrogen, and too alkaline attracts too many hydrogen ions. The right balance is usually somewhere in the middle (called ‘pH neutral’). Some plants change color depending on the level of acidity in the soil – hydrangeas turn pink in acidic soil and blue in alkaline soil.
There are many different kinds of acids: citric acid (in a lemon), tartaric acid (in white wine), malic acid (in apples), acetic acid (in vinegar), and phosphoric acid (in cola drinks). The battery acid in your car is a particularly nasty acid called sulfuric acid that will eat through your skin and bones. Hydrochloric acid is found in your stomach to help digest food, and nitric acid is used to make dyes in fabrics as well as fertilizer compounds.
Please login or register to read the rest of this content.
No kidding! You’ll be able to show your friends this super-cool magic show chemistry trick with very little fuss (once you get the hang of it). This experiment is for advanced students. Before we start, here are a few notes about the setup to keep you safe and your nasal passages intact:
The chemicals required for this experiment are toxic! This is not an experiment to do with little kids or pets around, and you want to do the entire experiment outside or next to an open window for good ventilation, as the fumes from the sodium hydroxide/zinc solution should not be inhaled.
This experiment is not dangerous when you follow the steps I’ve outlined carefully. I’ll take you step by step and show you how to handle the chemicals, mix them properly, and dispose of the waste when you’re done.
Goggles and gloves are a MUST for this experiment, as the sodium hydroxide (in both liquid and solid form) is caustic and corrosive and will burn your skin on contact.
Please login or register to read the rest of this content.
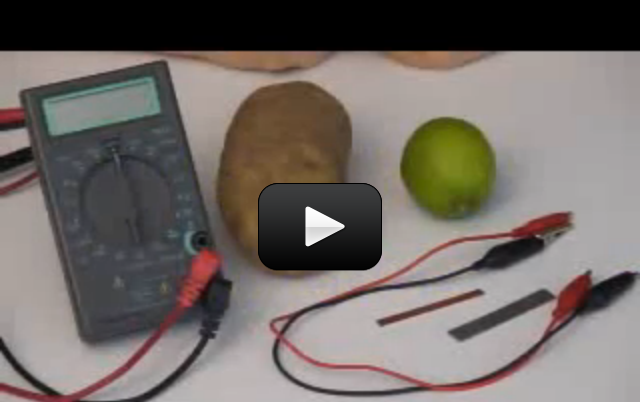
This experiment shows how a battery works using electrochemistry. The copper electrons are chemically reacting with the lemon juice, which is a weak acid, to form copper ions (cathode, or positive electrode) and bubbles of hydrogen.
These copper ions interact with the zinc electrode (negative electrode, or anode) to form zinc ions. The difference in electrical charge (potential) on these two plates causes a voltage.
Materials:
- one zinc and copper strip
- two alligator wires
- digital multimeter
- one fresh large lemon or other fruit
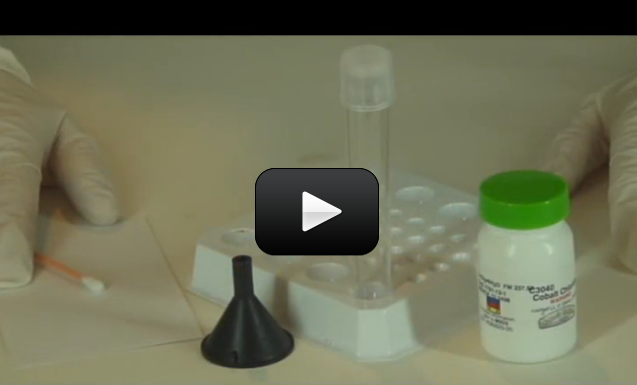
Cobalt chloride (CoCl2) has a dramatic color change when combined with water, making it a great water indicator. A concentrated solution of cobalt chloride is red at room temperature, blue when heated, and pale-to-clear when frozen. The cobalt chloride we’re using is actually cobalt chloride hexahydrate, which means that each CoCl2 molecule also has six water molecules (6H2O) stuck to it.
Please login or register to read the rest of this content.
If you don’t have equipment lying around for this experiment, wait until you complete Unit 10 (Electricity) and then come back to complete this experiment. It’s definitely worth it!
Electroplating was first figured out by Michael Faraday. The copper dissolves and shoots over to the key and gets stuck as a thin layer onto the metal key. During this process, hydrogen bubbles up and is released as a gas. People use this technique to add material to undersized parts, for place a protective layer of material on objects, to add aesthetic qualities to an object.
Materials:
- one shiny metal key
- 2 alligator clips
- 9V battery clip
- copper sulfate (MSDS)
- one copper strip or shiny copper penny
- one empty pickle jar
- 9V battery
I have tried for years to make whole wheat bread from scratch, but my loaves usually wound up as hockey pucks or door stops. Although my house always smelled great, my family could never choke down the crumbs of my latest creation. That’s when I enrolled in a bread-making class. Guess what I found out?
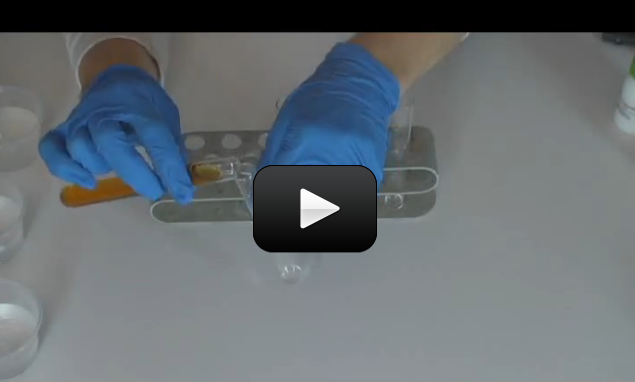
Please login or register to read the rest of this content.
This is the experiment that your audience will remember from your chemistry magic show. Here’s what happens – you call up six ‘helpers’ and hand each a seemingly empty test tube. Into each test tube, pour a little of the main gold-colored solution, say a few magic words, and their test tubes turn clear, black, pink, gold, yellow, and white. With a flourish, ask them to all pour their solutions back into yours and the final solution turns from inky black to clear. Voila!
I first saw a similar experiment when I was a kid, and I remembered it all the way through college, where I asked my professor how I could duplicate the experiment on my own. I was told that the chemicals used in that particular experiment were way too dangerous, and no substitute experiment was possible, especially for the color reversal at the end. I was determined to figure out an alternative. After two weeks of nothing but chemistry and experiment testing, I finally nailed it – and the best part is, you have most of these chemicals at the grocery store. (And the best part is, I can share it with you as I’ve eliminated the nasty chemicals so you don’t have to worry about losing an eyeball or a finger.)
NOTE: This experiment requires adult help, as it uses chemicals that are toxic if randomly mixed together. Follow the instructions carefully, and do not mix random chemicals together.
Are you ready to mix up your own rainbow?
Please login or register to read the rest of this content.
If you love the idea of mixing up chemicals and dream of having your own mad science lab one day, this one is for you. You are going to mix up each solid with each liquid in a chemical matrix.

In a university class, one of the first things you learn in chemistry is the difference between physical and chemical changes. An example of a physical change happens when you change the shape of an object, like wadding up a piece of paper. If you light the paper wad on fire, you now have a chemical change. You are rearranging the atoms that used to be the molecules that made up the paper into other molecules, such as carbon monoxide, carbon dioxide, ash, and so forth.
How can you tell if you have a chemical change? If something changes color, gives off light (such as the light sticks used around Halloween), or absorbs heat (gets cold) or produces heat (gets warm), it’s a chemical change.
What about physical changes? Some examples of physical changes include tearing cloth, rolling dough, stretching rubber bands, eating a banana, or blowing bubbles.
About this experiment: Your solutions will turn red, orange, yellow, green, blue, purple, hot, cold, bubbling, foaming, rock hard, oozy, and slimy, and they’ll crystallize and gel — depending on what you put in and how much!
This is the one set of chemicals that you can mix together without worrying about any lethal gases. I do recommend doing this OUTSIDE, as the alcohol and peroxide vapors can irritate you. Always have goggles on and gloves on your hands, and a hose handy in case of spills. Although these chemicals are not harmful to your skin, they can cause your skin to dry out and itch. Wear gloves (latex or similar) and eye protection (safety goggles), and if you’re not sure about an experiment or chemical, just don’t do it. (Skip the peroxide and cold pack if you have small kids.)
Materials:
• sodium tetraborate (borax, a laundry whitener)
• sodium bicarbonate (baking soda)
• sodium carbonate (washing soda)
• calcium chloride (also known as “DriEz” or “Ice Melt”)
• ammonium nitrate (single-use disposable cold pack)
• isopropyl rubbing alcohol
• hydrogen peroxide
• acetic acid (distilled white vinegar)
• water
• liquid dish soap (add to water)
• muffin tin or disposable cups
• popsicle sticks for stirring and mixing
• tablecloths (one for the table, another for the floor)
• head of red cabbage (indicator)
Please login or register to read the rest of this content.
When you chill helium, nothing changes until it gets extremely cold. It remains a gas until it reaches a temperature below 5 Kelvin (-267.960 Celsius, -450.3280 Fahrenheit) at a pressure of 2.24 atm (227kPa).
1908 Heike Onnes cooled helium to below 5 Kelvin. At this temperature helium turns into a liquid. He could not solidify it by cooling it further because helium does not have a triple point temperature where solid, liquid, and gas phases are in equilibrium with one another. In 1906, solid helium was created by subjecting helium to a pressure of 25 atmospheres at a temperature below 1K.
At temperatures close to absolute zero, helium does not exhibit any viscosity. This makes helium, under those conditions, something called a superfluid.
Please login or register to read the rest of this content.
First discovered in 1886 by Hans Heinrich Landolt, the iodine clock reaction is one of the best classical chemical kinetics experiments. Here’s what to expect: Two clear solutions are mixed. At first there is no visible reaction, but after a short time, the liquid suddenly turns dark blue.
Usually, this reaction uses a solution of hydrogen peroxide with sulfuric acid, but you can substitute a weaker (and safer) acid that works just as well: acetic acid (distilled white vinegar). The second solution contains potassium iodide, sodium thiosulfate (crystals), and starch (we’re using a starch packing peanut, but you can also use plain old cornstarch). Combine one with the other to get the overall reaction, but note that there are actually two reactions happening simultaneously.
Please login or register to read the rest of this content.
So this is probably the last chemical in your set you haven’t used… I had to really dig into my ‘bag of tricks’ to find something suitable for you to practice with.
Ammonium chloride is found near volcanoes and coal mines, as glue for plywood, in hair shampoo, in the electronics industry in solder, and also is fed to cows. It’s not typically experimented with in the chemistry lab, but since it’s in your set, I thought we’d play with it and see if you can figure out a few of its properties.
Use gloves and goggles when handling ammonium chloride, and make sure you have a fire extinguisher and a grown up handy!
Please login or register to read the rest of this content.
Why study chemistry? Baking is chemistry. Cars use chemistry to zip down the street. Your body converts food into energy using chemistry. Everything you see, touch, taste, and smell is a chemical.
Studying chemistry is like peeking under the hood of a racecar – you know you put gas in and it goes, but that’s all you can tell from the outside. Chemistry gets you into the inner workings on the molecular level. Are you ready? This video will get you started on the right foot for your study into chemical kinetics:
Please login or register to read the rest of this content.
Soon you’ll be able to explain everyday things, like why baking soda and vinegar bubble, why only certain chemicals grow crystals, what fire really is made of, how to transform copper into gold, and how to make cold light. Once you wrap your head around these basic chemistry ideas (like acids, polymers, and kinetics), you can make better choices about the products you use everyday like pain relievers, cold compresses, and getting a loaf of bread to rise. Are your ready? This video will get you started with your lesson in molecules:
Please login or register to read the rest of this content.
Mars is coated with iron oxide, which not only covers the surface but is also present in the rocks made by the volcanoes on Mars.
Today you get to perform a chemistry experiment that investigates the different kinds of rust and shows that given the right conditions, anything containing iron will eventually break down and corrode. When iron rusts, it’s actually going through a chemical reaction: Steel (iron) + Water (oxygen) + Air (oxygen) = Rust
Materials
- Four empty water bottles
- Four balloons
- Water
- Steel wool
- Vinegar
- Water
- Salt
Hydrogen peroxide is used to fuel rockets, airplanes, and other vehicle engines. Chemistry teachers everywhere use it to demonstrate the power of a catalyst.
To speed up a reaction without altering the chemistry of the reaction involves adding a catalyst. A catalyst changes the rate of reaction but doesn’t get involved in the overall chemical changes.
For example, leaving a bottle of hydrogen peroxide outside in the sunlight will cause the hydrogen peroxide to decompose. However, this process takes a long time, and if you don’t want to wait, you can simply toss in a lump of charcoal to speed things along.
The carbon is a catalyst in the reaction, and the overall effect is that instead of taking two months to generate a balloon full of oxygen, it now only takes five minutes. The amount of charcoal you have at the end of the reaction is exactly the same as before it started.
A catalyst can also slow down a reaction. A catalytic promoter increases the activity, and a catalytic poison (also known as a negative catalyst, or inhibitor) decreases the activity of a reaction. Catalysts offer a different way for the reactants to become products, and sometimes this means the catalyst reacts during the chemical reaction to form intermediates. Since the catalyst is completely regenerated before the reaction is finished, it’s considered ‘not used’ in the overall reaction.
In this experiment, you'll see that there's a lot of oxygen hiding inside the peroxide - enough to really make things interesting and move around! You'll also find out what happens to soap when you bubble oxygen through it. Are you ready?
Please login or register to read the rest of this content.
Want a peek under the 'hood' of my brain when I do a mental math calculation? This video is a slow-motion, step-by-step snapshot of what goes on when I add numbers in my head. The first thing you need to learn is how to add from LEFT to RIGHT, which is opposite from most math classes out there. I'll show you how to do this - it's easy, and essential to working bigger numbers in your head.
Here's what you do:
Please login or register to read the rest of this content.
Let’s see how much you’ve picked up with these experiments and the reading – answer as best as you can. (No peeking at the answers until you’re done!) Just relax and see what jumps to mind when you read the question. You can also print these out and jot down your answers in your science notebook.
Please login or register to read the rest of this content.
Need answers?
Let’s see how you did! If you didn’t get a few of these, don’t let it stress you out – it just means you need to play with more experiments in this area. We’re all works in progress, and we have our entire lifetime to puzzle together the mysteries of the universe!
Here’s printer-friendly versions of the exercises and answers for you to print out: Simply click here for printable questions and answers.
Answers:
Please login or register to read the rest of this content.
Let’s see how much you’ve picked up with these experiments and the reading – answer as best as you can. (No peeking at the answers until you’re done!) Just relax and see what jumps to mind when you read the question. You can also print these out and jot down your answers in your science notebook.
Please login or register to read the rest of this content.
Let’s see how you did! If you didn’t get a few of these, don’t let it stress you out – it just means you need to play with more experiments in this area. We’re all works in progress, and we have our entire lifetime to puzzle together the mysteries of the universe!
Here’s printer-friendly versions of the exercises and answers for you to print out: Simply click here for printable questions and answers.
Answers:
Please login or register to read the rest of this content.
This stuff is definitely sci-fi weird, and probably not appropriate for younger grades (although we did have a seven year old reiterate in his own words this exact phenomenon to a physics professor, so hey… anything possible! Which is why we’ve included it here.)
This experiment is also known as Young’s Experiment, and it demonstrates how the photon (little packet of light) is both a particle and a wave, and you really can’t separate the two properties from each other. If the idea of a ‘photon’ is new to you, don’t worry – we’ll be covering light in an upcoming unit soon. Just think of it as tiny little packets or particles of light. I know the movie is a little goofy, but the physics is dead-on. Everything that “Captain Quantum” describes is really what occurred during the experiment. Here’s what happened:
So basically, any modification of the experiment setup actually determines which slit the electrons go through. This experiment was originally done with light, not electrons. and the interference pattern was completely destroyed (as shown in the end of the video) by an ‘observer’. This shows you that light can either be a wave or a particle, but not both at the same time, and it has the ability to flip between one and the other very quickly. (The image at the left is a photograph of an interference pattern – the same thing you’d see on the wall if you tried this experiment.)
So, both light and electrons have wave-particle characteristics. Now, take your brain this last final step… it’s easier to see how this could be true for light, you can imagine as a massless photon.
But an electron has mass. Which means that matter can act as a wave. Twilight zone, anyone?
Read more about this in our Advanced Physics Section.
What would happen if our solar system had three suns? Or the Earth had two moons? You can find out all these and more with this lesson on orbital mechanics. Instead of waiting until you hit college, we thought we’d throw some university-level physics at you… without the hard math.
Please login or register to read the rest of this content.
These are a set of videos made using planetarium software to help you see how the stars and planets move over the course of months and years. See what you think and tell us what you learned by writing your comments in the box below.
What’s odd about these star trails?
You can really feel the Earth rolling around under you as you watch these crazy star trails.
Please login or register to read the rest of this content.
Ever wonder exactly how far away the planets really are? Here’s the reason they usually don’t how the planets and their orbits to scale – they would need a sheet of paper nearly a mile long!
To really get the hang of how big and far away celestial objects really are, find a long stretch of road that you can mark off with chalk. We’ve provided approximate (average) orbital distances and sizes for building your own scale model of the solar system.
When building this model, start by marking off the location of the sun (you can use chalk or place the objects we have suggested below as placeholders for the locations). Are you ready to find out what’s out there? Then let’s get started.
Materials:
- measuring tape (the biggest one you have)
- tape or chalk to mark off the locations
- 2 grains of sand or white sugar
- 12″ beach ball
- 3 peppercorns
- golf or ping pong ball
- shooter-size marble
- 2 regular-size marbles
Please login or register to read the rest of this content.
After you've participated in the Planetarium Star Show (either live or by listening to the MP3 download), treat your kids to a Solar System Treasure Hunt! You'll need some sort of treasure (I recommend astronomy books or a pair of my favorite binoculars, but you can also use 'Mars' candy bars or home made chocolate chip cookies (call them Galaxy Clusters) instead.
You can print out the clues and hide these around your house on a rainy day. Did you know that I made these clues up myself as a refresher course after the astronomy presentation? Enjoy!
Why does the Sun flare? Unpredictably, our Sun unleashes tremendous flares expelling hot gas into the Solar System that can affect satellites, astronauts, and power grids on Earth. This close up of an active region on the Sun that produced a powerful X-class flare was captured by the orbiting TRACE satellite. The glowing gas flowing around the relatively stable magnetic field loops above the Sun's photosphere has a temperature of over ten million degrees Celsius. These flows occurred after violently unstable magnetic reconnection events above the Sun produced the flare. Many things about solar active regions are not well understood including the presence of dark regions that appear to move inward during the movie.
This is a real video of the sun captured from the Solar Dynamics Observatory:
Astrophysics not only looks at nearby planets and distant stars, it also deals with the center of our solar system: the Sun. Our Sun is not quite a sphere (it’s a little flat on one side), which actually made the initial calculations of Mercury’s orbit incorrect when we estimated it to be a perfect ball. Our Sun is a G-type star, and recent measurements indicate that our Sun is brighter than 85% of the stars in our own galaxy. It takes light about 8 minutes to travel from the Sun to the Earth, meaning that if the Sun were to suddenly and magically disappear, we wouldn’t know about it for 8 minutes.
The Sun is made of hot plasma and is 1.3 million times the size of our Earth. The Sun holds 99% of the mass of our solar system, but only has 1% of the momentum. It’s 74% hydrogen and 24% helium, with trace amounts of oxygen, carbon, iron, and neon. Scientists split the incoming light into a giant 40-foot rainbow and looked for signs of which elements are burning through a special instrument called a spectrometer (you’ll be building one of these in this section) to figure out the Sun’s composition.
With a 15 million oC core, the Sun is not on fire, but rather generates heat by smacking protons together and getting a puff of energy through a process called nuclear fusion. We can’t directly observe the core of the Sun, but we can figure out what’s going on inside by watching the patterns on the surface. You’ll learn more about this in the activity that covers helioseismology. The surface temperature of the Sun is about 5500oC, so it cools considerably when the gases bubble up to the surface.
The Sun rotates differentially, since it’s not solid but rather a ball of hot gas and plasma. The equator rotates faster than the poles, and in one of the experiments in this section, you’ll actually get to measure the Sun’s rotation. This differential rotation causes the magnetic fields to twist and stretch. The Sun has two magnetic poles (north and south) that swap every 11 years as the magnetic fields reach their breaking point, like a spinning top that’s getting tangled up in its own string. When they flip, it’s called “solar maximum,” and you’ll find the most sunspots dotting the Sun at this time.
The video below is taken from the very first images from the National Science Foundation's Daniel Inouye Solar Telescope. Do you see the bubbling, rolling surafe of the sun? The size of onen of the "cells" is about the state of Texas, or the size of France, just to give you an idea of scale.
The telescops is on top of a mountain in Hawaii that has a huge 13 foot mirror (the largest ever used ona solar solar telescope), and it also sits along with all the other instruments, on a 16.5 meter table weighing 100 tons that slowly rotates to track the position of the sun as it travels through the sky.
And if you want to see an image of the sun right now, you can visit SOHO's main page.
Want to safely view the sun yourself? Here's how to do it...
You know you're not supposed to look at the sun, so how can you study it safely? I'm going to show you how to observe the sun safely using a very inexpensive filter. I actually keep one of these in the glove box of my car so I can keep track of certain interesting sunspots during the week!
The visible surface of the sun is called the photosphere, and is made mostly of plasma (remember the grape experiment?) that bubbles up hot and cold regions of gas. When an area cools down, it becomes darker (called sunspots). Solar flares (massive explosions on the surface), sunspots, and loops are all related the sun’s magnetic field. While scientists are still trying to figure this stuff out, here’s the latest of what they do know...
The sun is a large ball of really hot gas - which means there are lots of naked charged particles zipping around. And the sun also rotates, but the poles and the equator move and different speeds (don’t forget – it’s not a solid ball but more like a cloud of gas). When charged particles move, they make magnetic fields (that’s one of the basic laws of physics). And the different rotation rates allow the magnetic fields to ‘wind up’ and cause massive magnetic loops to eject from the surface, growing stronger and stronger until they wind up flipping the north and south poles of the sun (called ‘solar maximum’). The poles flip every eleven years.
There have been several satellites specially created to observe the sun, including Ulysses (launched 1990, studied solar wind and magnetic fields at the poles), Yohkoh (1991-2001, studied x-rays and gamma radiation from solar flares), SOHO (launched 1995, studies interior and surface), and TRACE (launched 1998, studies the corona and magnetic field).
Ok - so back to observing the sun form your own house. Here's what you need to do:
Comet Shoemaker Levy Colliding with Jupiter
Spectacular images of Jupiter during and after impacts, when over twenty fragments of Comet Shoemaker-Levy 9 smashed into the planet in July 1994. Click here to read more.
Solar Flares caught by SOHO
This mega-flare was seen being spewed out by the Sun starting at 20:29 CET on 4 November 2003. This video sequence was captured by SOHO’s Extreme ultraviolet Imaging Telescope. Don’t worry about the image being green – it’s just the filter they used in order to see.Click here to read more.
In this video below, astronomers blocked out the sun (seen as a white circle in the center of the red disk) so they could see the action in the corona.
Something every person should do in their lifetime is watch a rocket or space shuttle launch. Since this is getting harder and harder, and most folks don’t live in a convenient area for viewing launches, here’s one of the best launches filmed on video. STS-119 (ISS assembly flight 15A) was a space shuttle mission to the International Space Station (ISS) which was flown by Space Shuttle Discovery during March 2009.
It delivered and assembled the fourth starboard Integrated Truss Segment (S6), and the fourth set of solar arrays and batteries to the station. The launch took place on March 15, 2009, at 7:43 p.m. EDT. Discovery successfully landed on March 28, 2009, at 3:13 p.m. EDT.
Lyman Spitzer was a theoretical physicist and astronomer who worked on star formation and plasma physics. The scape telescope named after him is equipped with infrared imaging capability that enables the telescope to see through dust and gas clouds to reveal what lies underneath.
Spitzer is part of the 1970s idea NASA conceived for the Great Observatories. The idea was to have the Hubble Space Telescope operate in the visible range, Chandra which operates in the x-ray, and Spitzer which operates in the infrared. Here’s an informational video about Spitzer:
Subrahmanyan Chandrasekhar was one of the most careful, thorough, and impressive astronomers in the first part of the 20th century who worked in may different areas of astronomy, making great leaps with his discoveries. He won the Nobel prize for his ideas about when and how to get supernova, which he did while traveling on a boat at age 19! Chandra had a very elegant way of using mathematics to describe atmospheres of planets and stellar structures of galaxies. He was one of the few researchers that is able to teach as well as do his own research.
The Chandra X-Ray Observatory is the third of NASA’s Great Observatories. Chandra looks for high energy X-ray radiation, which appears near supernovae, supermassive black holes and neutron stars. Here’s an video about the telescope itself and how difficult it is to observe x-rays:
NASA’s Deep Impact Mission
Launch and flight teams are in final preparations for the planned Jan. 12, 2005, liftoff from Cape Canaveral Air Force Station, Fla., of NASA’s Deep Impact spacecraft. The mission is designed for a six-month, one-way, 431 million kilometer (268 million mile) voyage. Deep Impact will deploy a probe that essentially will be “run over” by the nucleus of comet Tempel 1 at approximately 37,000 kilometers per hour (23,000 miles per hour). It’s like hitting a comet with something the size of a fridge. Click here to read more.
Galileo Probe Mission to Jupiter
Galileo was an unmanned spacecraft sent by NASA to study the planet Jupiter and its moons. Named after the astronomer and Renaissance pioneer Galileo Galilei, it was launched on October 18, 1989 by the Space Shuttle Atlantis on the STS-34 mission. It arrived at Jupiter on December 7, 1995, a little more than six years later, via gravitational assist flybys of Venus and Earth.
Galileo conducted the first asteroid flyby, discovered the first asteroid moon, was the first spacecraft to orbit Jupiter, and launched the first probe into Jupiter’s atmosphere.
On September 21, 2003, after 14 years in space and 8 years of service in the Jovian system, Galileo’s mission was terminated by sending the orbiter into Jupiter’s atmosphere at a speed of nearly 50 kilometres per second to avoid any chance of it contaminating local moons with bacteria from Earth. Of particular concern was the ice-crusted moon Europa, which, thanks to Galileo, scientists now suspect harbors a salt water ocean beneath its surface. Click here to read more.
Cassini-Huygens Mission to Saturn
The incredible journey to Saturn and Titan. Click here to read more.
New Horizons Mission to Pluto
This montage of New Horizons images shows Jupiter and its volcanic moon, Io. The images were taken during the spacecraft’s near-pass of the gas giant in early 2007. Credit: NASA/JHU/APL New Horizons’ voyage through the Jupiter system in 2007 provided a bird’s-eye view of a dynamic planet that has changed since the last close-up looks by NASA spacecraft. Click here to read more.